1) What account is logged into NVivo?
Access to your transcription account is based on the account that you are currently logged into in NVivo. You can check this by opening NVivo and looking at the Welcome screen. Here you can see what account that is logged in right now, or if no account is logged in at all. From here you can also log out of the account and log in to another account.
2) The Transcription module
You access the Transcription module from the "Modules" tab, see below.
Use NVivo Transcription to transcribe media files from NVivo
1. Open the project containing the audio or video files you want to transcribe. On the Modules tab click Transcription.
You are logged into Transcription with the same myNVivo account you are logged into NVivo with (shown in the Account Manager dropdown in the top-right of the interface![]() ). If you are not logged into NVivo you will be prompted to log in. (If you have multiple accounts, select one with a valid Transcription subscription or credits.)
). If you are not logged into NVivo you will be prompted to log in. (If you have multiple accounts, select one with a valid Transcription subscription or credits.)
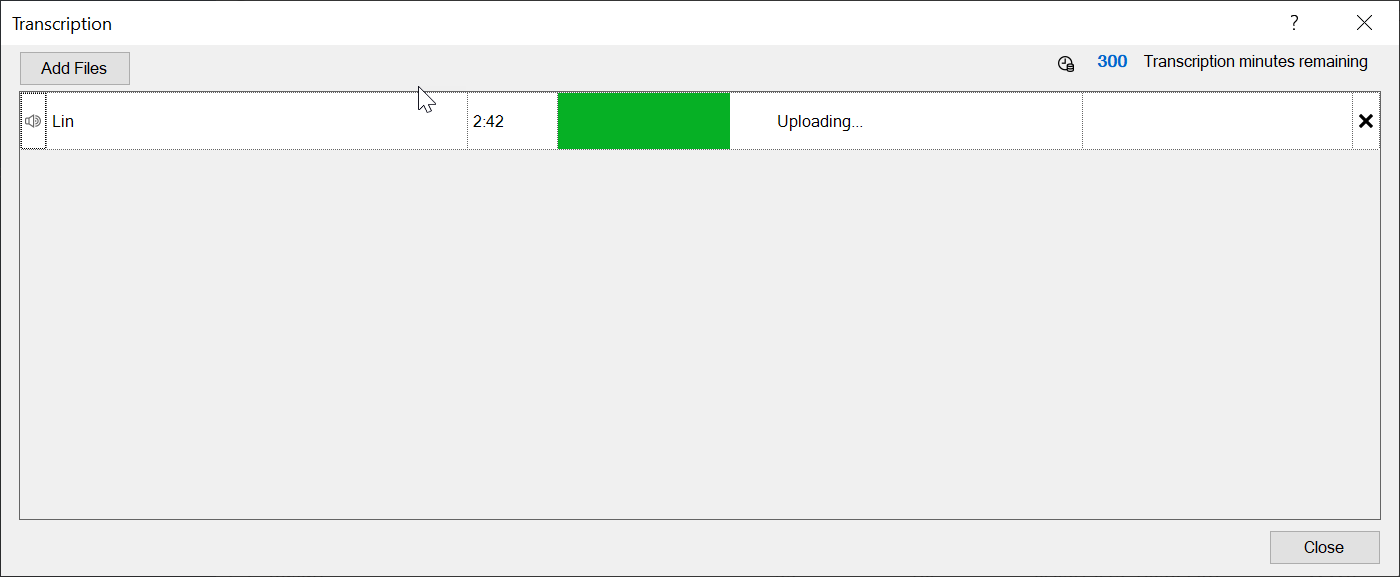
Note: Once you are logged in with the correct account you will see the below Transcription window where you can upload your files to be transcribed. Here, you can also see how many transcription minutes you have left on your account.
In the Transcription dialog box, click Add Files to add audio or video files to transcribe. Once added, the files automatically upload to NVivo Transcription on the web.
-

NOTE You can populate the Transcription dialog box before you open it—open a media file that you want to transcribe before opening the dialog box, or right-click the file in the List View and select Transcription.
The duration of each file is displayed. If you have pay-as-you-go credits, the number of minutes' transcription time available is shown at the top of the dialog box (refreshed every five minutes).
-
When the files have uploaded select the language being spoken in each, then click Transcribe.
-
When transcription is finished click Review transcript to open the transcript in the web editor (the first time you do this you may need to log into your myNVivo account again).
-
Edit the transcript using the web editor, making corrections as necessary and optionally adding speaker names.

(See directions for the editor in the Transcription Help, here.)
-
Return to the NVivo Transcription dialog box in NVivo and click Import.

The transcript is imported and embedded as the transcript of the media file you uploaded.
-
Open the media file in NVivo to see the transcript.
-
If necessary you can edit further in NVivo Audio and video transcripts.
Import a transcript from NVivo Transcription
You can also use the NVivo Transcription website directly and import you transcript into NVivo afterwards. If your transcript was exported from NVivo Transcription, follow the steps above using settings as follows:
Text file
- In the Import Transcript Entries dialog box, for Create one transcript row for each, select Tab Delimited Line.
- Un-tick File includes header row.
- In Transcript Field Mappings, map the first field to Timespan, the second to speaker (type Speaker in the field), and the third to Content.

Word document
- In the Import Transcript Entries dialog box, for Create one transcript row for each, select Table Row.
- Un-tick File includes identifier column.
- Un-tick File includes header row.
- In Transcript Field Mappings, map the first field to speaker (type Speaker in the field), the second to Timespan, and the third to Content.
